Installing and Configuring Backup Agent for Windows
In2net Server Backup solution has two components: Backup agent and Backup manager.- Backup manager - a web based console for customers to manage their backup policies and their server backups.
- Backup agent - A passive software agent installed on your business server for synchronizing the data between Backup manager and your server.
This guide will use a 64-bit Windows 2008 R2 Server (Standard Edition) for backup as an example. Other versions of Windows server will follow similar installation steps.
1. Download a 64-bit Backup agent for Windows from the download area on www.in2net.com.
Selecting an incorrect version of Backup agent may lead to improper replication.

2. The file you download is called "ServerBackup-Enterprise-Agent-win64.zip". You need to extract its contents by third party application such as Winzip.
The content extracted consists of a folder called Win64 and a Enterprise-README.txt file. Inside Win64 folder is the executable file "ServerBackup-Enterprise-Agent-win64-5.2.1.exe" you need.
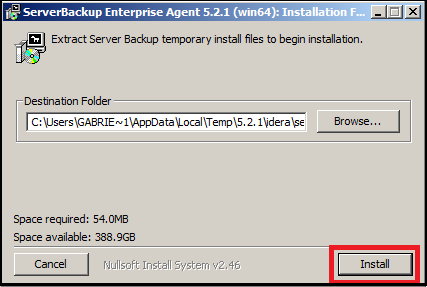
Run the executable and click [INSTALL] button to start the installation.
Click [NEXT] button to continue.

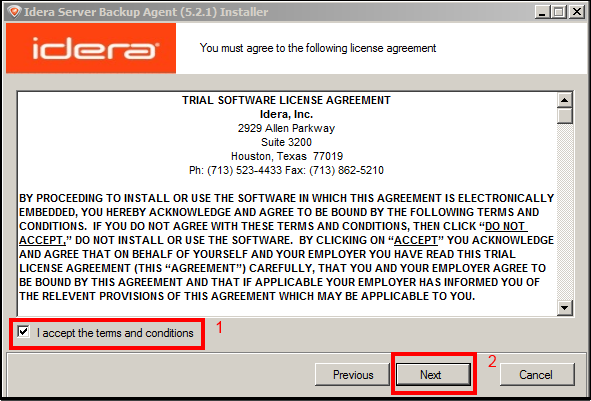
Accept the license agreement by clicking on the checkbox followed by clicking the [NEXT] button.
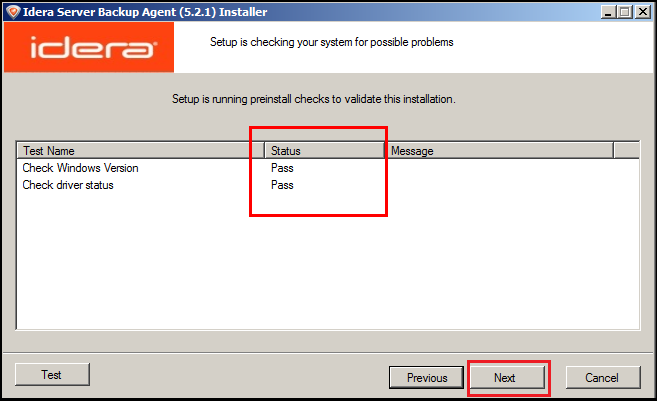
This following screen verifies whether your Windows server version and its drivers have met the software requirement for Backup agent.
Click [NEXT] button to continue. If the status shown in the Status column does not show PASS, you should correct the issue before resuming the installation.
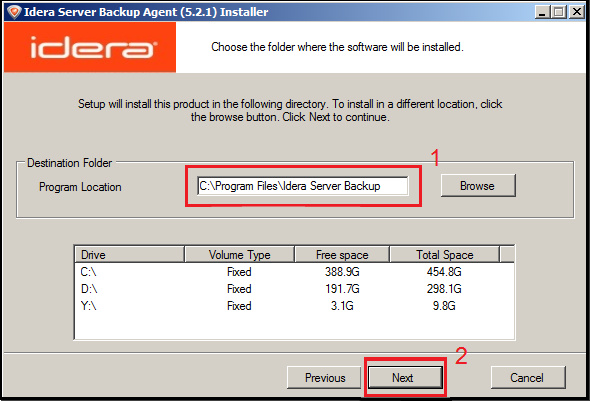
If you would like to change the default installation path (labelled 1 below) for Backup Agent, you can do so in the following screen.
Click [NEXT] button when complete.
Click the [NEXT] button again until you see the following screen. Click [FINISH] to close the Windows dialog.
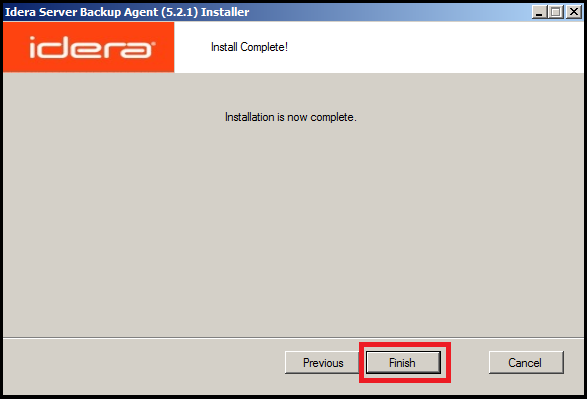
After the last step, you may be prompted to reboot your server. It is recommended you reboot your server before the next step.
Now you have complete the installation of Backup agent.
3. To configure the Backup agent, look for "Backup Agent Configuration Utility" under "Idera Server Backup" in your Windows menu.

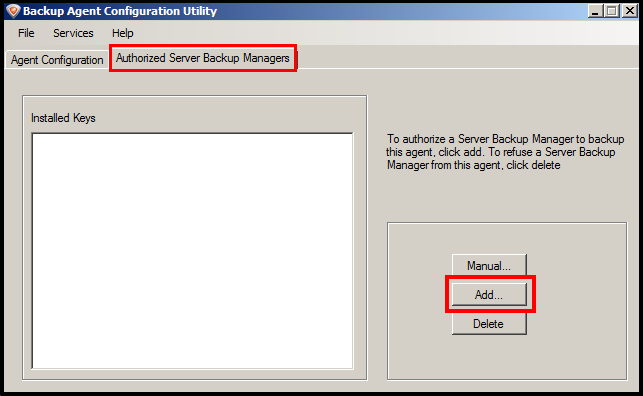
Backup Agent Configuration Utility contains two tabs: Agent Configuration and Authorized Server Backup Managers.
On Agent Configuration tab, you can leave everything unchanged.

On Authorized Server Backup Managers tab, you must authorize a particular Backup manager to interact with this agent by obtaining an encrypted key from Backup manager. To add the key, you need to know the ip address or url of Backup manager, provided by In2net Network Inc.
Click on [ADD...] button.
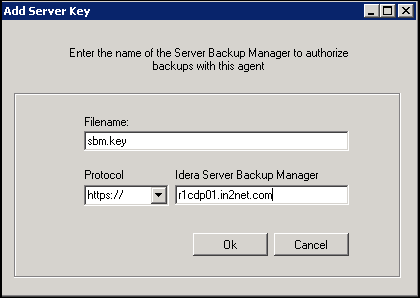
The following dialog box will appear. you may enter the protocol, Server backup manager's ip address and the filename.
a) Protocol: Select HTTPS
b) Idera Server Backup Manager: r1cdp01.in2net.com (url or ip address provided by In2net)
c) Filename: The encrypted key is stored as a file in your server. You need to give this file a name. We use sbm.key in this example.
Click OK when done.
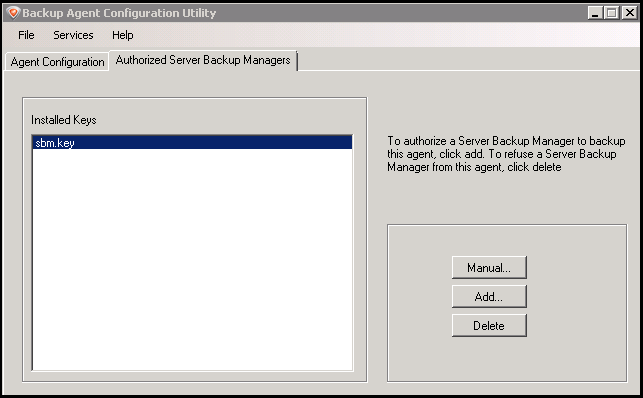
If you have added the server key successfully, you should see a screen like the following.
a) Make sure the url or ip address of the Server backup manager is correct.
b) Ensure your firewall(hardware/software)'s tcp port (1167 by default) is open.

Now you may proceed to protect your first server by following this link.
Related Articles
No related articles were found.Attachments
No attachments were found.Article Details
Last Updated
30th of August, 2013
Would you like to...
User Opinions
100% 0%
0%
 (1 vote)


 The article has been updated successfully.
