Browsing Recovery Points
1. To browse the Recovery Points, first select "Recovery Points" in the main menu.
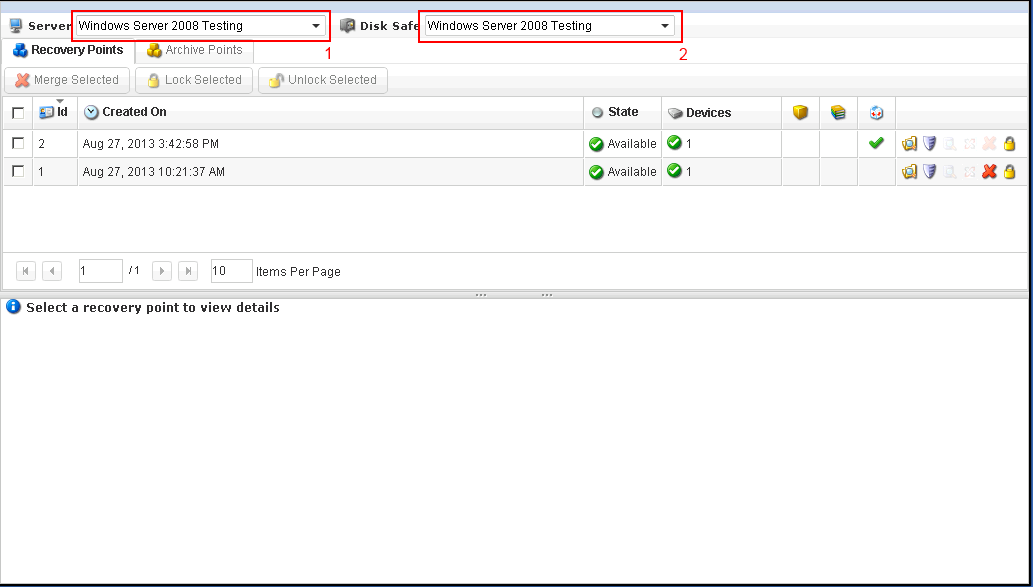
2. Select a Server from the Server Dropdown box, then Select a Disk Safe from the Disk Safe dropdown box.

3. In the Recovery Point list, find a recovery point, and click on the "Browse" icon for this recovery point as shown below.

NOTE: When you create a disk safe for your server, if you have enabled passphrase encryption, you will be asked to enter the encryption passphrase, when you click on the "Browse", "Bare Metal Restore", "Browse Database" or "Exchange" icon.

4. The "Browse Recovery Point" window will open.

5. The "Browse Recovery Point" interface functions like Windows Explorer. You may browse files and folders contained in the selected recovery point.

6. You may also use the Location input box to go to the desired folder or you may find out the current path by looking at Location input box. If you enter your own folder path, please click [GO] button afterwards.

6. You may also use the [UP] button to go to the parent folder.

Related Articles
No related articles were found.Attachments
No attachments were found.Article Details
Last Updated
30th of August, 2013


 The article has been updated successfully.
