Launching Bare Metal Restore
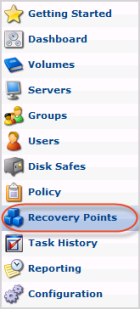
After booting the bare metal live CD with Backup Agent running, and the network has been configured properly, you may now use your internet browser to access the Backup manager.1. Click on "Recovery Points" in the Main Menu to open the "Recovery Points" screen
2. Select a server from the drop-down menu on the "Recovery Points" list

3. Select a Disk Safe from the dropdown menu located on the Recovery Points list

4. In the Recovery Points list, click on Bare metal restore icon in the Actons column for the recovery point from which you are going to restore.
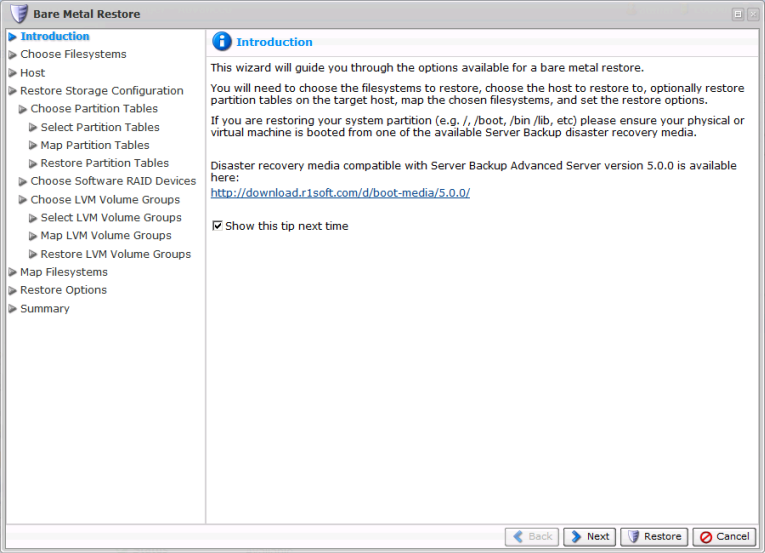
5. This would open the Bare metal restore window. Now read through the information on the screen. Click [Next] to the next screen.
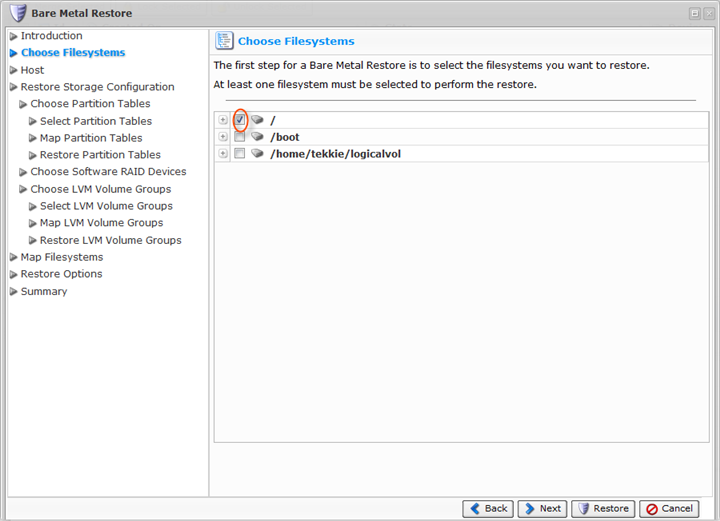
6. The screen shows each file systems (and swap device if Linux) available in the Recovery Point. You can select the file system you want to restore. Note that all file systems available are listed and you must selecct one of the file systems by clicking on the appropriate check box. To view the file system, simply click on the "+" icon in front of the file system name.
Click [Next] button to proceed to the next screen.
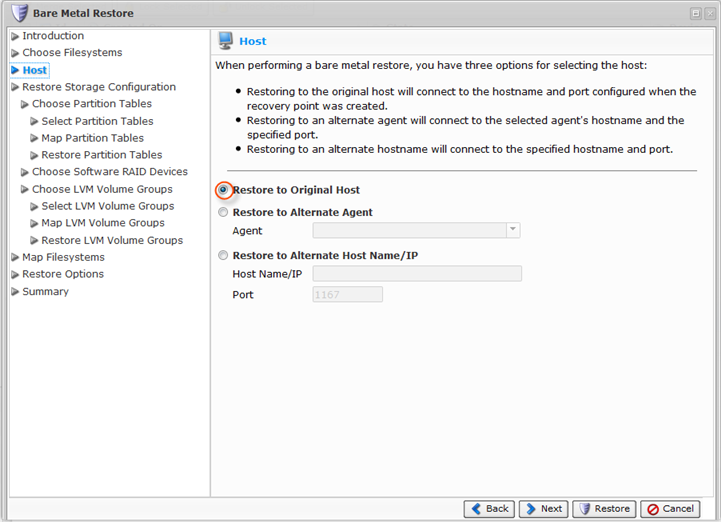
7. This screen contains three options. You must select one of them.
- Restore to Original Host - The same Server Name/IP address and port as the original Server. Connects to the Server name and uses the port configured when the Recovery Point was created.
- Restore to Alternate Server - Connects to the selected SErver hostname and specific port. The Server must have aleady been added to the system.
- Restore to Alternate Host Name/IP - Connects to the specified Host Name and port. This option allows you to Restore to a Host with a Host Name/IP address different from the original Host.
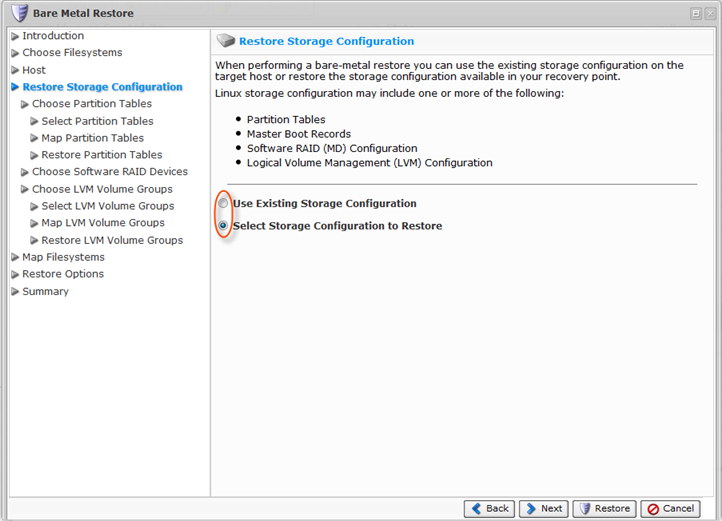
8. The next screen shows two options. Select one of the following options:
- Use Existing Storage Configuration - Bare metal restore uses the existing Storage Configuration. This option should almost never be used when performing a bare metal restore.
- Select Storage Configuration to Restore - Selecting this option lets you pick a Storage Configuration to restore to the target Server. In most cases, this is the option you should select.
9. In the next screen, you would need to choose partitions tables. Click [Next] when completing your selection.
- Use Existing Partition Table on Host - Bare metal restore will use the partition layout already present on the target Server. This option should almost never be used when performing a bare metal restore
- Select Partition Tables to Restore - Selecting this option lets you pick partition tables from the Recovery Point to restore to the target Server. In most cases, you should select this option.
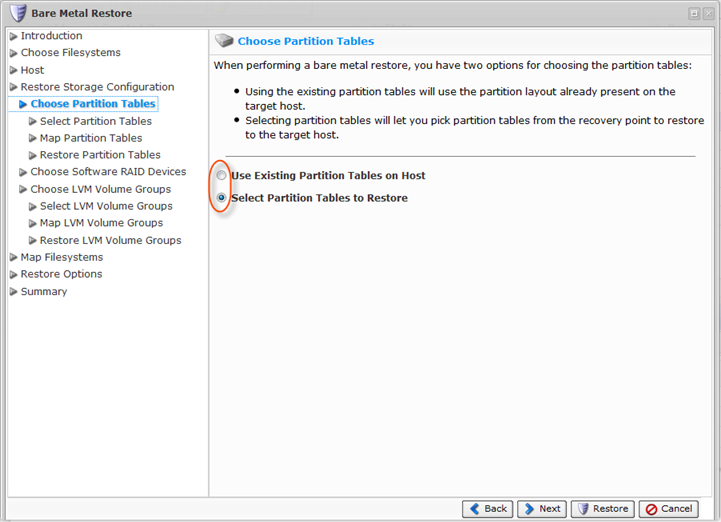
If Select Partition Tables to Restore option has been selected, three additional steps will be shown.
- Select Partition Tables
- Map Partition Tables
- Restore Partition Tables
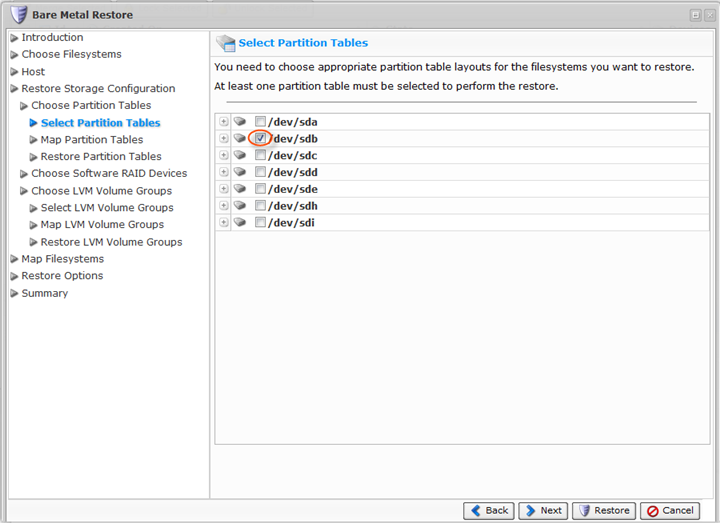
Select Partition Tables
Select the partition table layout(s) for the file systems you would like to restore. Click [Next] to continue.
Mapping Partition Tables
After choosing partition tables to restore, map the selected Partition Table(s) Recovery Points to physical Disks in the Target Server. From the drop-down menu, select the physical Disks you are going to restore to.
You are provided a table that allows you to map the chosen Partition Tables to physical Disks on the Target Server. You can see as many lines in the table as the number of Partition Tables selected for restore. Each Partition Table must be mapped to a physical Disk on the Taret Server before proceeding.
After selecting the Disks, click on [Next] to proceed to the next page.
Restoring Partition Tables
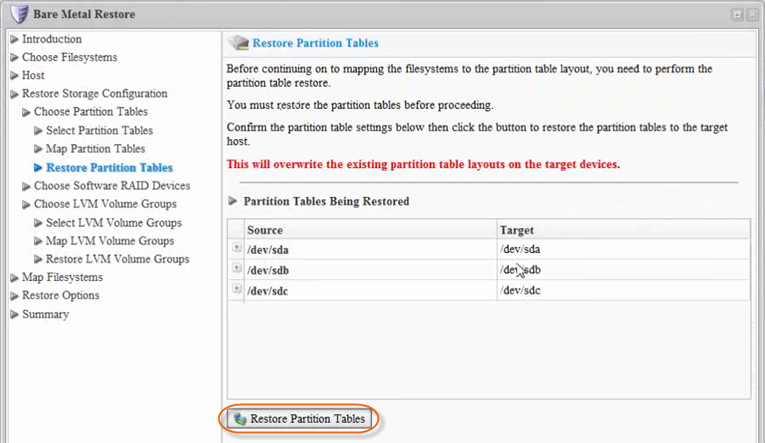
Perform the partition table restore by clicking the "Restore Partition Tables" button. Once confirmed, the Partition Table Restore will be initiated. A busy indicator will be displayed while the restore is in progress. Restoring the partition table should not take a lot of time beause the partition table fits into one 512-byte sector.
Note: Restored partition tables will overwite the existing partition table layout on the target devices.
When the process is over, click "OK" button in the notification pop-up.
Click [Next] to proceed to the following step.
10. On the "Choose Software RAID Device" screen, choose one(1) of the following options:
- Select Software RAID Device to Restore
- Use Existing Software RAID Device
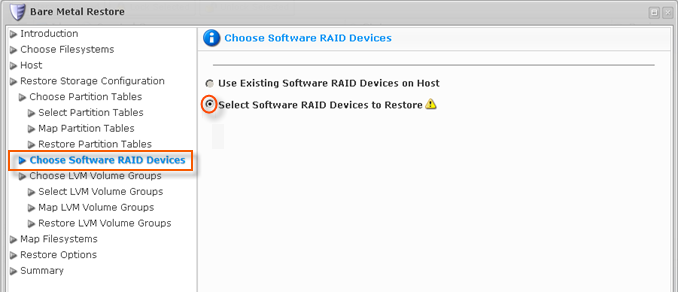
If you select the "Select Software RAID Device to Restore" option, three(3) additional steps will arise.
- Select Software RAID Device
- Map Software RAID Device
- Restore Software RAID Device
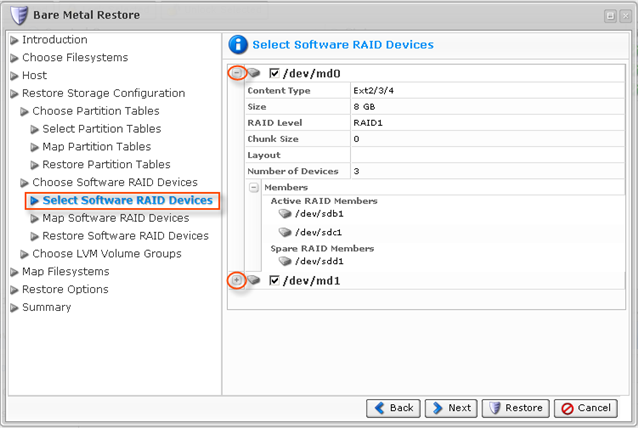
Select Software RAID Device
Select Software RAID Arrays to restore in the corresponding check-box. When complete, click [Next]
Map Software RAID Device
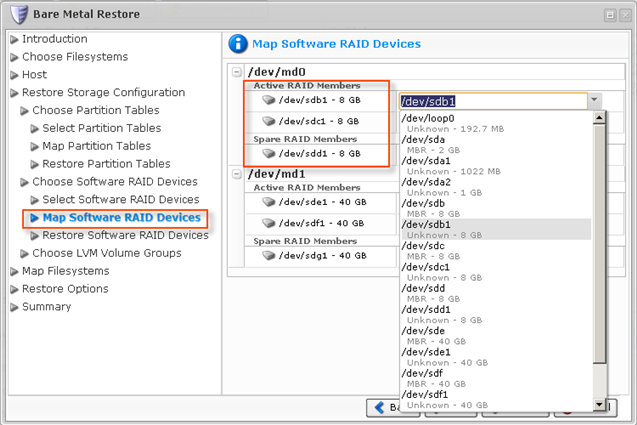
After choosing the Software RAID Arrays to restore, map them.
Note: Mapping RAID arrays is hierarchical. Instead of mapping the actual RAID device (/dev/md0), you should map its active and spare members.
Click [Next] to proceed to the next step.
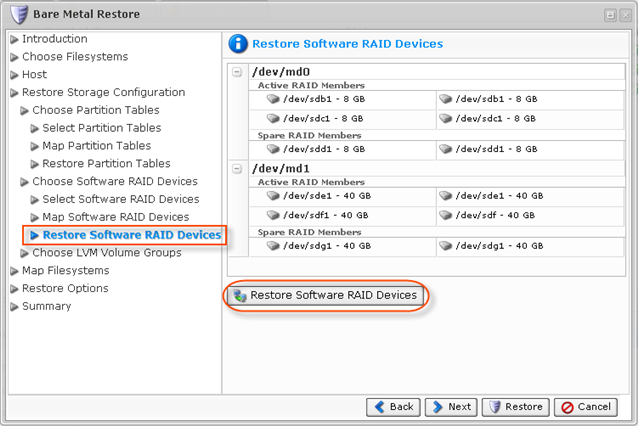
Restore Software RAID Device
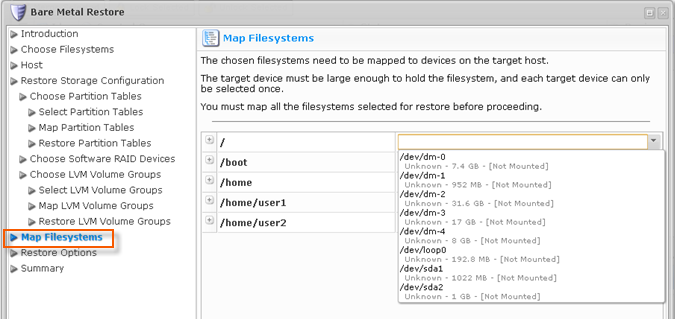
The following step requires to map the chosen file systems to the devices on the target machine. From the drop-down menu, select the destination devices for each source file system.
Note#1: The target device must be large enough to hold the file system.
Note#2: Each target device can only be selected once.
Click [Next] to proceed to the next step.
11. The following step requires you to map the chosen file systems to the devices on the target machine. From the drop-down menu, select the destination devices for each source file system.
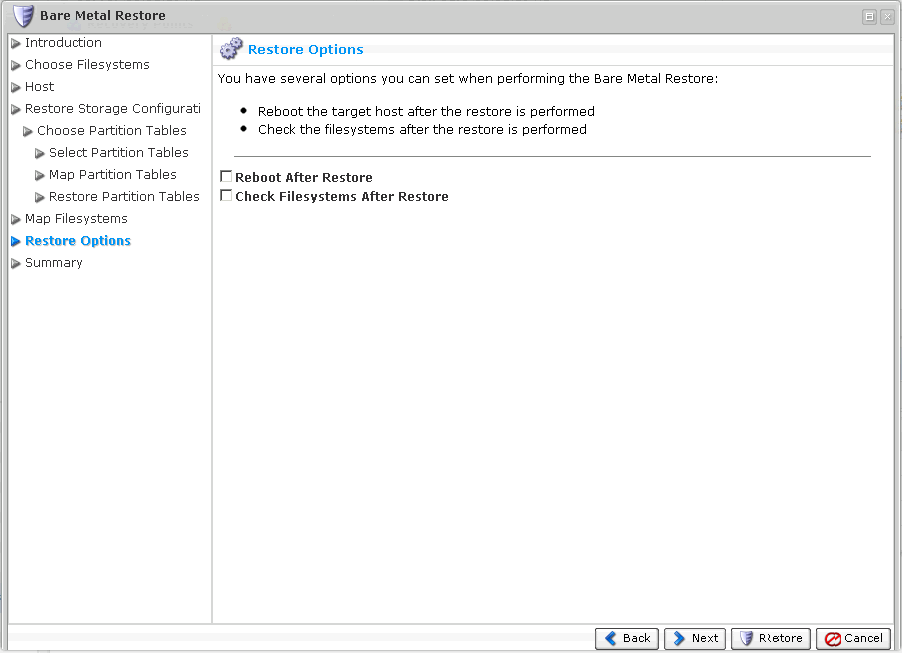
- Reboot After Restore - Reboot the target host after the restore is performed. Select this check-box to reboot your Server after the Bare metal restore is complete. This is a very useful option since you have to reboot the target host after the restore anyways.
- Check Filesystems after Restore - Check the file systems after the restore is performed.
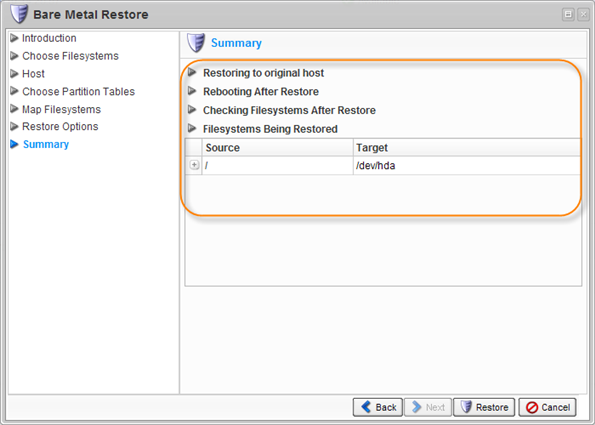
13. On the "Summary" page, you will need to confirm the selected bare metal restore options. Each selected file system is listed, along with the name of the target device it is being mapped to.
Click [Restore] to start the bare metal restore task.
14. The data Restore is initiated. Click [OK] in the notification pop-up.

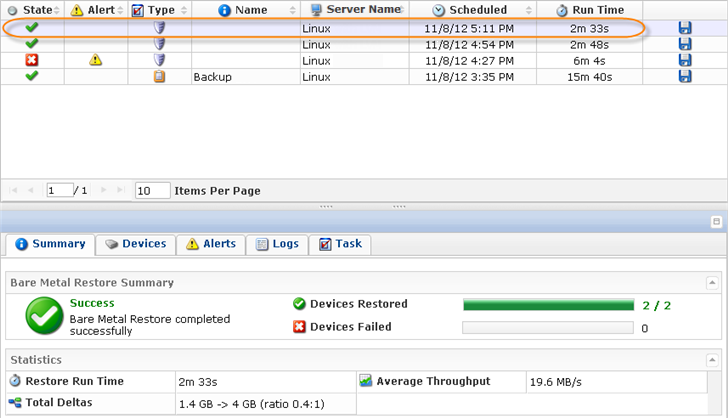
15. The Restore process starts and can take a while. You can go to the "Task History" screen to observe the task progress.
The Task History page displays the State, Alert, Type, Progress percentage, and the Started time stamp of the bare metal restore process.
Note: If the disk you used for your Bare metal restore is larger than the disk you backed up previously, the free space on the new disk will remain free. You may create a new partition in this space.
Related Articles
No related articles were found.Attachments
No attachments were found.Article Details
Last Updated
30th of August, 2013


 The article has been updated successfully.
